Thursday, 31 January 2019


Evaluation of Component 1
Evaluation
Component 1
Formal Elements & Photogenres
Formal Elements
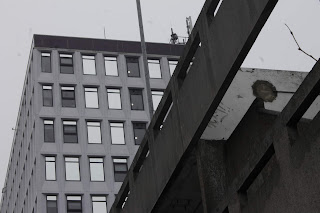
Formal elements is where my journey started in component 1. September 2018, I began with line, colour, texture & pattern, etc. In this interval and for a momentary spell in photogenres there was a lot of procrastination for the write-ups, which is an instant disadvantage on my point and therefore one of the weaknesses. However, this could be remedied by the amount of detail put into some of the posts, both in photo final pieces and in the detailed analysis/description. Two which particularly stand out are Tone, and Texture & Pattern. Texture & Pattern definitely stood out for the sheer quality of the photos, as shown from the two photos. They really describe what the surfaces might feel like. For example, it is so clear what the plank of wood must feel like, and its almost easy just to imagine it. It's quite interesting, as it explores how vividly the human mind can imagine things. In addition, photographically the photo of the building gives me pride in my work because of how it checks every mark. The tonal scale, rigid pattern, diagonal facing lines. It gives a plethora of detail for the viewer to look into. In truth, its one of my favourite photos throughout the entirety of component 1, with only a few getting as close as such.
Formal elements is where my journey started in component 1. September 2018, I began with line, colour, texture & pattern, etc. In this interval and for a momentary spell in photogenres there was a lot of procrastination for the write-ups, which is an instant disadvantage on my point and therefore one of the weaknesses. However, this could be remedied by the amount of detail put into some of the posts, both in photo final pieces and in the detailed analysis/description. Two which particularly stand out are Tone, and Texture & Pattern. Texture & Pattern definitely stood out for the sheer quality of the photos, as shown from the two photos. They really describe what the surfaces might feel like. For example, it is so clear what the plank of wood must feel like, and its almost easy just to imagine it. It's quite interesting, as it explores how vividly the human mind can imagine things. In addition, photographically the photo of the building gives me pride in my work because of how it checks every mark. The tonal scale, rigid pattern, diagonal facing lines. It gives a plethora of detail for the viewer to look into. In truth, its one of my favourite photos throughout the entirety of component 1, with only a few getting as close as such.


Photogenres
 When regarding this unit, I believe I improved from the previous unit in a variety of ways, by focusing more directly on the artist, and taking constructive criticism from my peers on how better to shoot my photos. In the unit I would always start by more heavily researching into the artist I was given. Analysing their photos on anything that I could replicate and transform in my own work, using the artists as a guide for where I should be heading. As well as this, artist research sometimes led me to find brand new techniques to use. For example, Victoria Siemer's photo-manipulation has given me insight into ways to change the composition of a photo to give a brand new atmosphere to it. Another artist I focused on was Annie Leibovitz. She is a portraiture photographer and has used low-key lighting to put focus onto the details of a face or person. Moreover, it creates the feeling of negative space which is very successfully captured in many other photographer's shoots.
Photography isn't just about the influence and post-production, though. While also improving in that sector, I also have taken more time concentrating on the camera settings, composition of my photos and the lighting around the scene. Instead of just putting it to recommended settings and pressing 2 or-so buttons, I've been trying to take my time with each scene, picturing how I want it to look in the final image. For example, if it's in the studio I want to know where the lighting should be facing, and how much to use. Or if it's outside, is the sun in the right place, or if I intend to have sun-rays or just pure cloud. Then there is composition; is there a way to get a natural border? Or is there a significant centrepiece or not. Obviously there are still exceptions where I'm in a rush and need the photo as soon as possible, but that's one of the reasons those settings are on the camera. Either way, as I've progressed I've improved technically at a modest pace.

Portfolio
Regarding the portfolios, I believe it could've went a lot better, while also could've been a lot worse. The photos I got for it definitely reflected the skill I've had throughout the component, however the photos I could have got and didn't is quite disappointing. The main issue with this is most likely the fact I am not putting enough time into the craft and preventing myself from truly reaching my full potential in the course. However, with the photos I did get I definitely excelled the passing grade. During my time analysing artists for the portfolio groups, I learned


Thursday, 24 January 2019
Independent Shoot 1 [Photogenres]
Independent Shoot One
Photogenres
Research Influence
AO1 Alexander Rodchenko
Skilled photographer Alexander Rodchenko (b. 1891 - 1956) was a famed photographer and artist in the USSR, well known for his architecture photos and interesting perspectives, usually taken from the bottom-up. His photos gained traction through the 20th century and remain popular in the 21st century. Some of my favourites are found below.
The first photo pictures an old Russian car park with an interesting clean-cut style to each of the parts. The photography links to both line and tone because of the multiple diagonal lines crossing the page. It gives a real industrial vibe to the photo and really shouts 20th century Russia. Furthermore, it pictures how intricate or well-built man-made objects have become. In my opinion it connotes to the idea that we are altering Earth from it's original natural state into something of our own.
Next on the list is a photo taken below a ladder of a subject climbing up. The photo some-what uses negative space similar to the others, which gives a feeling of mystery on who this man is. Other than that, there isn't much to tell about this photo. It generally ticks the boxes like tone, line and shape. Acing the tonal range as well as centring the eye on the "horizon" of the photo where the ladder ends.
Finally, we see one of his most well-known photos of a commercial building from Russia. It takes an unorthodox angle of centring on the left side of the building rather than centring, which although might sound bad actually ends up looking intriguing and catches the viewer's eye.


Full Shoot
AO2 Contact sheet

5 Best Photos
My favourites


Edits
AO2 How I edited my photos
In a new way of editing, I decided to experiment with Camera Raw; a tool which comes up after opening .RAW files in Photoshop prior to opening them in the original application. It allows some very helpful settings which come from Lightroom, and give the user the ability to create professional photos via using settings like dehaze, clarity and being able to edit the highlights, shades, blacks and whites. It gives the user much more of an advantage in creating their photos.
To give an example of how I edited my photos, I took one of my photos from the contact sheet to give a good example of a good edit.


After using Camera Raw, I touched up the photo by using the Spot Healing Brush, which can be found above the brush. I used this on the tree branch in the side, and the brush uses an algorithm to find different parts of the photo which match what the selected area should or would look like, giving a smooth transition into the area being healed. This was originally made for portraiture Photoshopping, by removing spots and marks on some of the models' bodies, for example with a model on a magazine. Off of the tangent, after finishing the healing brush usage I messed about quickly with some adjustments, finding the best looking piece. Sadly though, the photo itself was very grainy from the low lighting of the time, so I couldn't find anything that helped improve it further other than a minor exposure change. If we don't count the grainy issue, the photo is an exemplar piece of editing.


Final Photos
AO4 and evaluation


Research Influence
AO1 Alexander Rodchenko
Skilled photographer Alexander Rodchenko (b. 1891 - 1956) was a famed photographer and artist in the USSR, well known for his architecture photos and interesting perspectives, usually taken from the bottom-up. His photos gained traction through the 20th century and remain popular in the 21st century. Some of my favourites are found below.
The first photo pictures an old Russian car park with an interesting clean-cut style to each of the parts. The photography links to both line and tone because of the multiple diagonal lines crossing the page. It gives a real industrial vibe to the photo and really shouts 20th century Russia. Furthermore, it pictures how intricate or well-built man-made objects have become. In my opinion it connotes to the idea that we are altering Earth from it's original natural state into something of our own.
Next on the list is a photo taken below a ladder of a subject climbing up. The photo some-what uses negative space similar to the others, which gives a feeling of mystery on who this man is. Other than that, there isn't much to tell about this photo. It generally ticks the boxes like tone, line and shape. Acing the tonal range as well as centring the eye on the "horizon" of the photo where the ladder ends.
Finally, we see one of his most well-known photos of a commercial building from Russia. It takes an unorthodox angle of centring on the left side of the building rather than centring, which although might sound bad actually ends up looking intriguing and catches the viewer's eye.


Full Shoot
AO2 Contact sheet

5 Best Photos
My favourites
Two Images to Improve
Photos which don't hit the mark
The top five photos shown are based off of Rodchenko, while giving a modern twist to the critically acclaimed photographer. The photos take the original urban, grunge theme and bring it into the 21st century. The photos are purposefully taken in a way to structure part of the image to have an older theme, much like the Soviet style of Rodchenko's work. However, to branch out into my own design I'm intertwining modern pieces to give that effect of how cities naturally grow very gradually, and not everything is updated to modern standards. Many cities and towns are a mix of 20th and 21st century structures mismatched into one area, which is a unique aspect to the United Kingdom. It gives quite a unique view to what may usually not be recognised.
When it comes to the final two photos shown, I believe they don't quite reach the potential I can get from the photos. Both photos can go through post-production and receive amazing improvement, but they don't quite match the brief, and also might come out too grainy or over-exposed if they're completed in post.
Edits
AO2 How I edited my photos
In a new way of editing, I decided to experiment with Camera Raw; a tool which comes up after opening .RAW files in Photoshop prior to opening them in the original application. It allows some very helpful settings which come from Lightroom, and give the user the ability to create professional photos via using settings like dehaze, clarity and being able to edit the highlights, shades, blacks and whites. It gives the user much more of an advantage in creating their photos.
To give an example of how I edited my photos, I took one of my photos from the contact sheet to give a good example of a good edit.


After using Camera Raw, I touched up the photo by using the Spot Healing Brush, which can be found above the brush. I used this on the tree branch in the side, and the brush uses an algorithm to find different parts of the photo which match what the selected area should or would look like, giving a smooth transition into the area being healed. This was originally made for portraiture Photoshopping, by removing spots and marks on some of the models' bodies, for example with a model on a magazine. Off of the tangent, after finishing the healing brush usage I messed about quickly with some adjustments, finding the best looking piece. Sadly though, the photo itself was very grainy from the low lighting of the time, so I couldn't find anything that helped improve it further other than a minor exposure change. If we don't count the grainy issue, the photo is an exemplar piece of editing.


Final Photos
AO4 and evaluation


Tuesday, 15 January 2019
Composite Image
 Composite Images
Definition & Theory
Photoshop will be a very important tool for composite imaging, if you do not have a dark room nearby. It is a complex editing tool which allows you to edit and distort images.
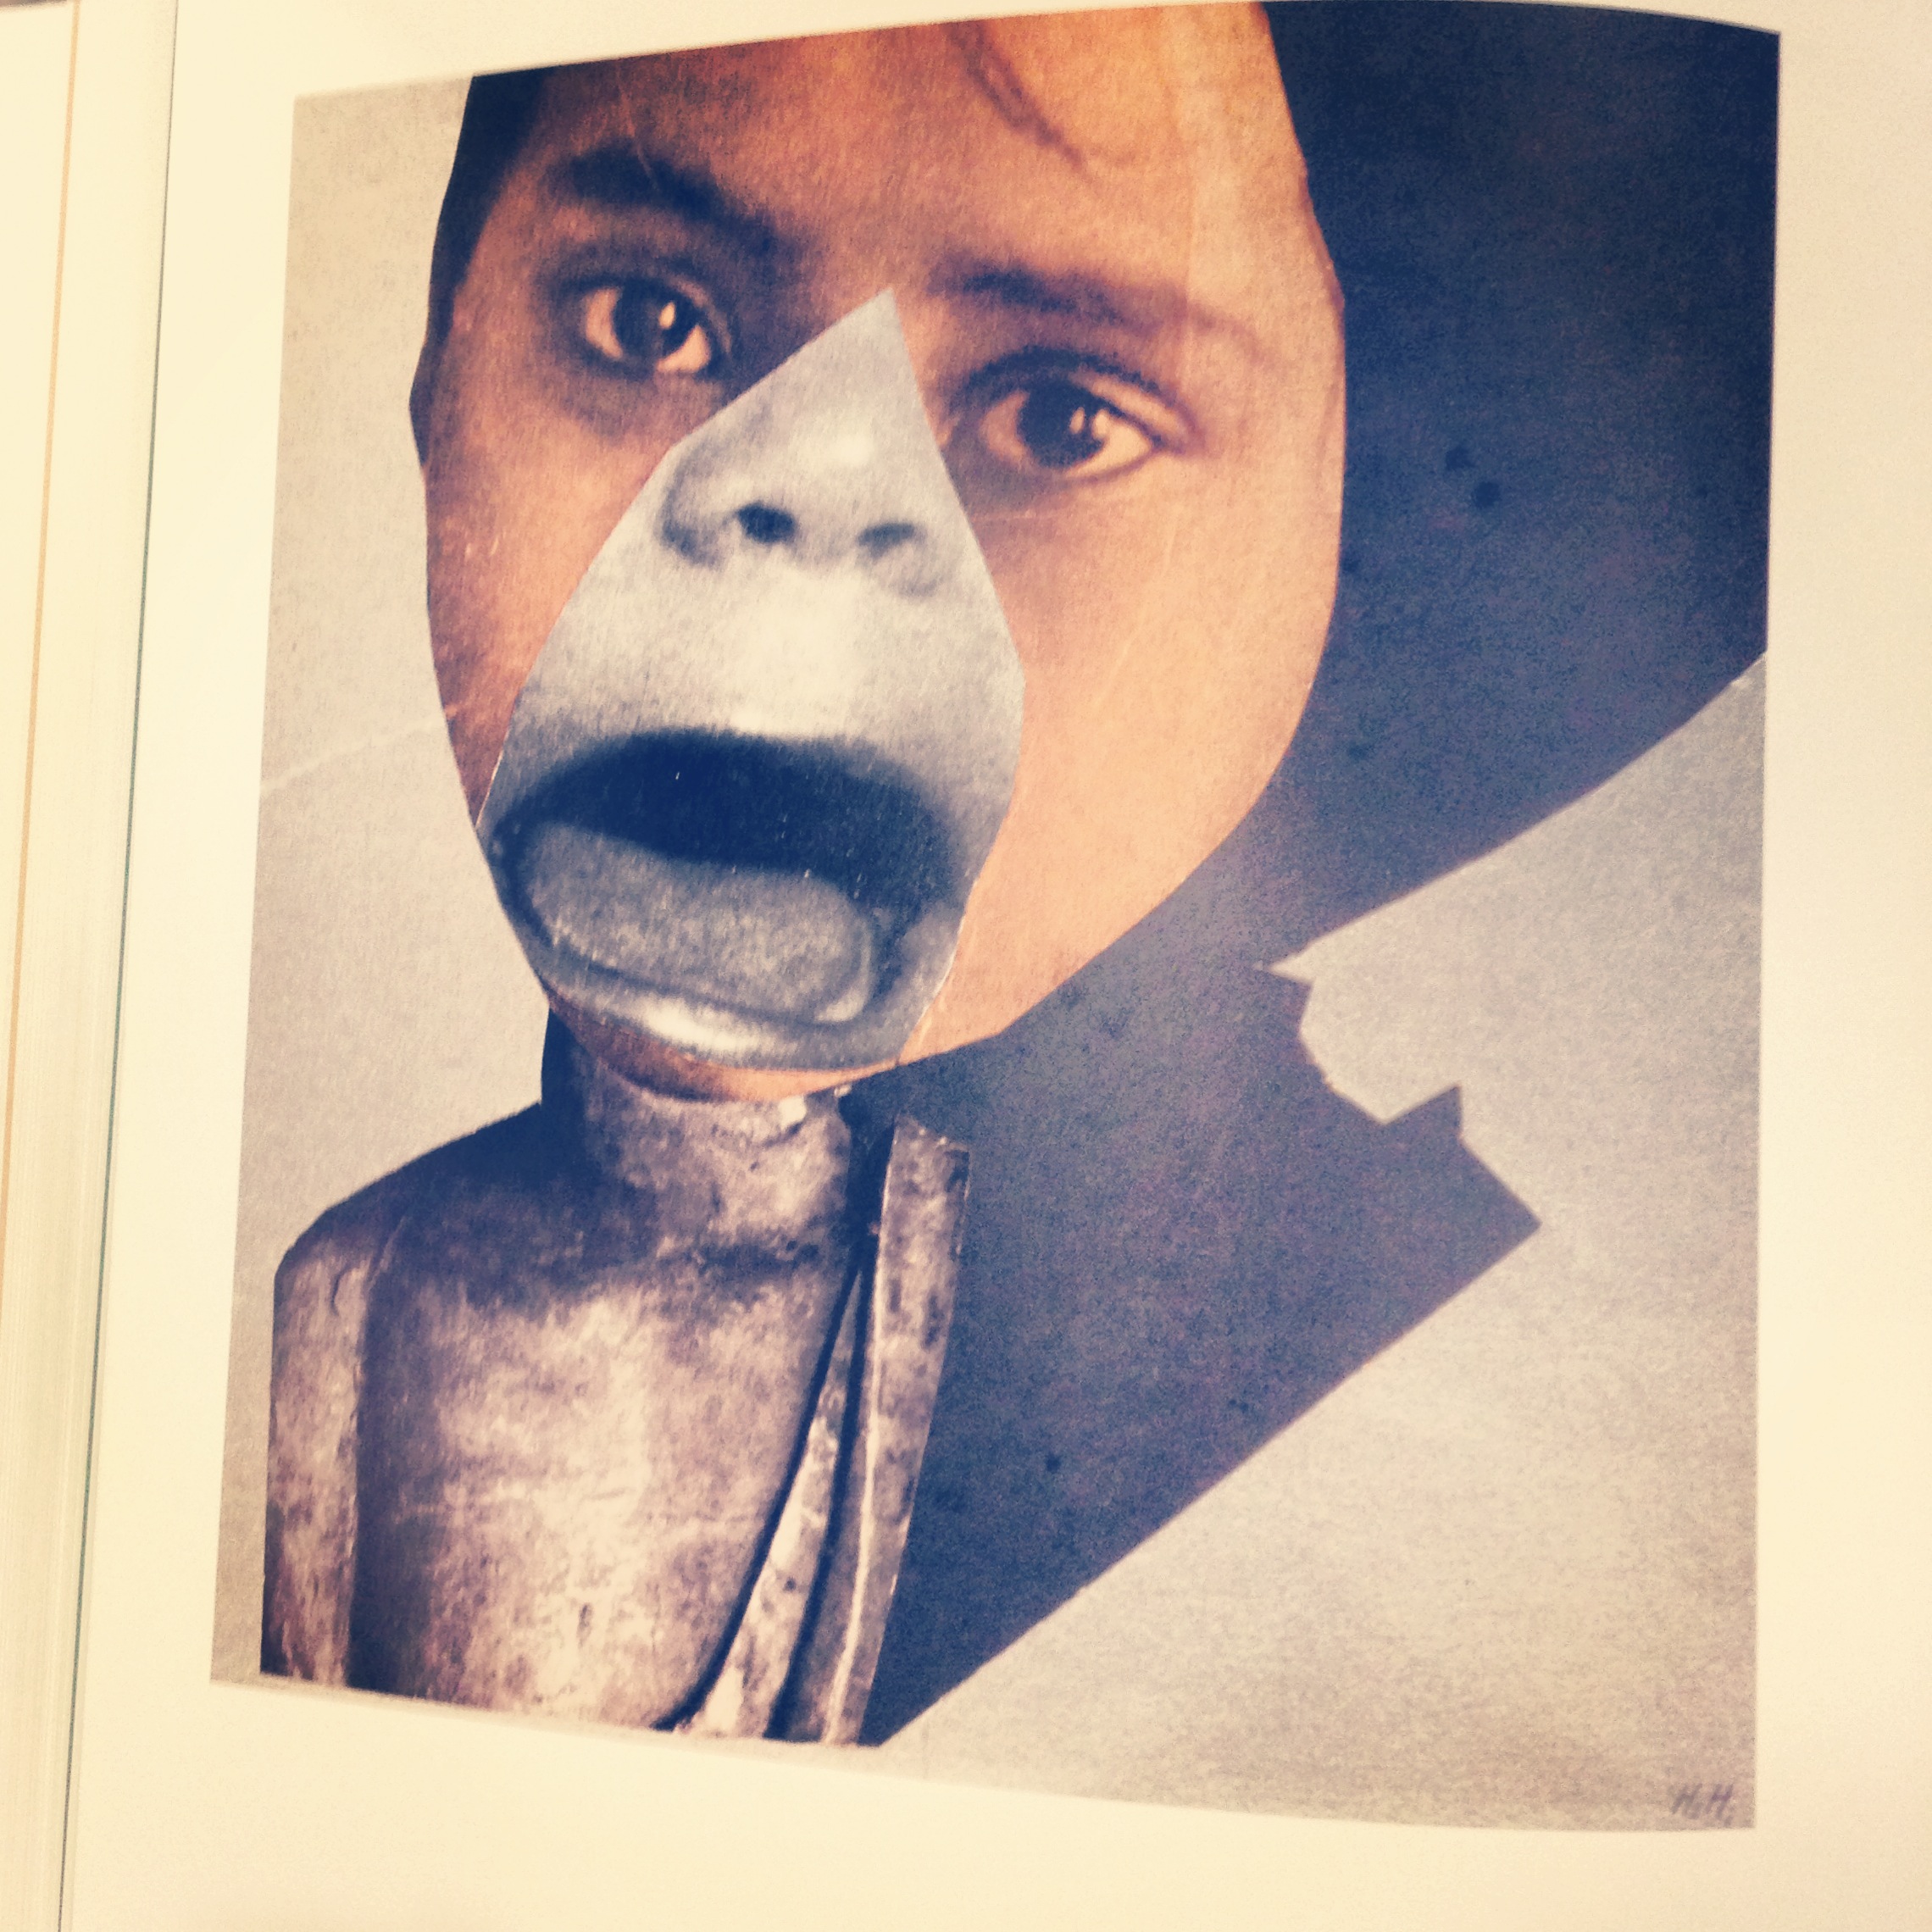
Digital compositing typically is superimposing multiple parts of an image onto another background image, and usually people who use darkrooms do it. This is because of how the darkroom allows you to play and experiment with different ideas. A few composite artists are Hannah Hoch and Raoul Hausmann.
These two photographers could also be considered comedians of the time, and use a technique called "dada" which is where comedians create humorous images which had been edited in a way to get a laugh from the viewer.

There are many ways in which conventional techniques are used to do these images. For example; Photoshop (used for editing and manipulating the photo, by using things like layering and copy+paste, levels, adjustments, etc) and superimposing.
AO1 Artist Research - Victoria Siemer
Analysis of Victoria Siemer
Siemer's photography is of extremely crisp photos of wide landscapes or cityscapes, while also putting them literally upside down. She manipulates a sphere or similar shape around itself and places it directly above the original, area, which gives a very surreal feeling. It doesn't have very clear connotations compared to the other photographers however, because the main focus is of providing a crisp image. However, the photos themselves may link to the silence found in such areas, and how tranquil they are. Even the bustling cities are quiet from high up. It might connote to finding peace of mind in the most scenic or most bustling places. The way the circles seamlessly flow back into the photo once they reach the centre. This will probably be one of my favourite photographers to edit, as it gives a lot of freedom on how to make them.


AO1 Artist Research cont. - Jerry Uelsmann
Analysis of Jerry Uelsmann
Uelsmann follows a different path into composition and he finds direct connotation within a photo, or imaginative areas. For example, the first photo shows a top of a tree with some overgrown roots. However, these roots actually make up a photo of another tree he had taken a photo of. He uses it to give a surrealist feel to it, as it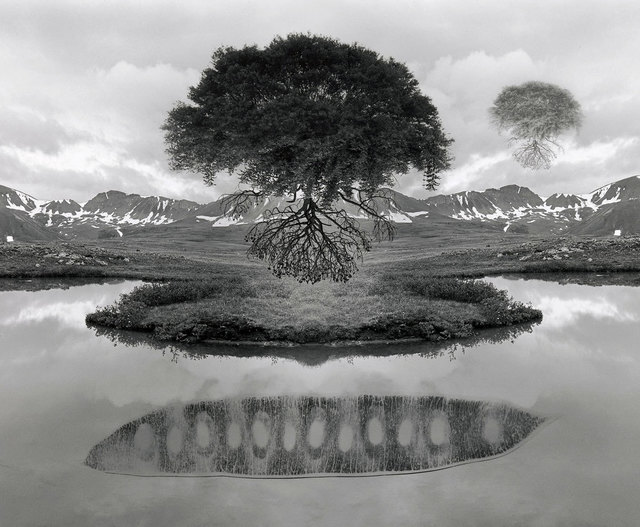
Image Bank

(van is put in in post)
AO2 Contact Sheet
All photos taken to respond to the artists


For the photos, I reused two of my older photos (only one was used already) as we are only required to find and edit two photos to show a successful response to the artists. However, I will be reusing the first image multiple times in the final piece, as it will help give a better and more interesting scene. My plan is to edit the first photo like Victoria Siemer, making a circular reflection directly above the centre of the picture. Furthermore, I will be using an unedited version of the photo to use as the background of the second, which is something which links to Jerry Uelsmann.
AO3 Edits
How I edited my photos

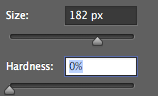
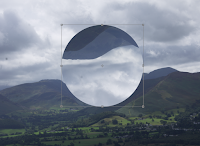 The photos I've created have been done in quite complex ways compared to how I usually edit, due to how it needs to be a sort of reflection. Starting off, I get the ellipsis tool and create a perfect circle in the centre third, centring on the horizon, and copy+pasted it into a new layer. Then, I create a layer mask on the layer by pressing the button which has a white square with the black circle in it. After that, I used CMD+T (CTRL+T) to free-transform. Then I rotated it 180 degrees. Finally, I used the eraser tool and cautiously removed parts of the image which are shown as sky or cloud. The screenshot to the left shows the size and hardness of the e However, personally I decided to leave a bit of the edge as it seemed to give the circle a bit of a 3D element to it, as if it has a shadow or gradient to it before it gets to the front of the circle.
 Obviously, after I completed the edit I used the tools found in adjustments to give the photo more contrast and improve the general look of the image. Examples of that can be found above.
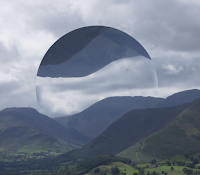 For the second photo, I decided to use the industrial-like cityscape and change the background to the original version of the image I just edited. This came out quite well as it turns out, and it has quite an interesting feel as it is almost like there is a contrast between the foreground and background, while they both seem to match the area. It's like it's trying to show the stark difference between nature and man-made. For the editing I deleted the background with the magnetic lasso (after creating a mask), and I then removed the lock on the first layer. This gave me the opportunity to paste the mountain photo and put the layer below the original photo. After a bit of relocating of the photo I got a photo which had a slightly out-of-place background. To make the transition between the two photos seem seamless, I made the entire photo black and white, and then edited the contrast on the background photo to match the unedited foreground. After I "calibrated" the contrast, I edited the entire photo to look much better.
Experiments
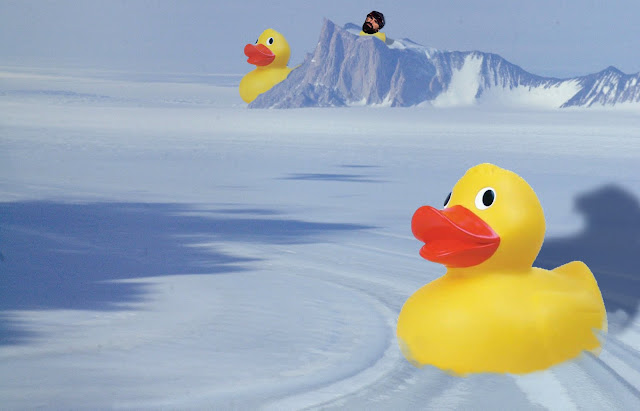
Using pre-made images, we were permitted to experiment with photos and compositions, so I decided to use the given images and made multiple different scenes, as well as taking another extra photo from Google (Ant Middleton)


 The photos I've created have been done in quite complex ways compared to how I usually edit, due to how it needs to be a sort of reflection. Starting off, I get the ellipsis tool and create a perfect circle in the centre third, centring on the horizon, and copy+pasted it into a new layer. Then, I create a layer mask on the layer by pressing the button which has a white square with the black circle in it. After that, I used CMD+T (CTRL+T) to free-transform. Then I rotated it 180 degrees. Finally, I used the eraser tool and cautiously removed parts of the image which are shown as sky or cloud. The screenshot to the left shows the size and hardness of the e However, personally I decided to leave a bit of the edge as it seemed to give the circle a bit of a 3D element to it, as if it has a shadow or gradient to it before it gets to the front of the circle. Obviously, after I completed the edit I used the tools found in adjustments to give the photo more contrast and improve the general look of the image. Examples of that can be found above.
  For the second photo, I decided to use the industrial-like cityscape and change the background to the original version of the image I just edited. This came out quite well as it turns out, and it has quite an interesting feel as it is almost like there is a contrast between the foreground and background, while they both seem to match the area. It's like it's trying to show the stark difference between nature and man-made. For the editing I deleted the background with the magnetic lasso (after creating a mask), and I then removed the lock on the first layer. This gave me the opportunity to paste the mountain photo and put the layer below the original photo. After a bit of relocating of the photo I got a photo which had a slightly out-of-place background. To make the transition between the two photos seem seamless, I made the entire photo black and white, and then edited the contrast on the background photo to match the unedited foreground. After I "calibrated" the contrast, I edited the entire photo to look much better.
Experiments
Using pre-made images, we were permitted to experiment with photos and compositions, so I decided to use the given images and made multiple different scenes, as well as taking another extra photo from Google (Ant Middleton)

Camera Settings
What I used to take my photos
For both the photos I used my Canon 1100D with the original lens, with a variety of settings. I used between F-15 and F-22, with an ISO of between 400 and 6400. The shutter speed was between 1/80 and 1/500.
For both the photos I used my Canon 1100D with the original lens, with a variety of settings. I used between F-15 and F-22, with an ISO of between 400 and 6400. The shutter speed was between 1/80 and 1/500.
Final Piece
All final photos


Subscribe to:
Posts (Atom)